Flamingoes in Ahmedabad Slideshow: Vraj’s trip from Gandhinagar, Gujarat, India to Ahmedabad was created by TripAdvisor. See another Ahmedabad slideshow. Create your own stunning free slideshow from your travel photos.
Tuesday, July 26, 2011
Saturday, July 16, 2011
Top Ten Wildlife Photography Tips
Top Ten Wildlife Photography Tips
by Paul Burwell in Equipment, Everything, Wildlife photography
Creating a tremendous wildlife photograph is an extremely rewarding pursuit. However, developing the skills and techniques necessary to create captivating wildlife images is more difficult than it might appear on the surface. Composition, lighting, equipment, natural history, and patience are just some of the areas the wildlife photographer needs to specialize in.
Sometimes wildlife photography can even be a spontaneous burst of creative impulses – if you catch a wren sitting in the morning sunlight in your garden, or find some squirrels quarrelling over nuts while you’re strolling past gatwick hotels on your way to a convention. Whether you’re prepared or grabbing your camera out of your bag to capture a unique moment while somewhere else, it’s important to maintain some semblance of skill and technique, even spontaneously, to be able to capture the magic and create high-quality images.
◦Equipment – Photographing wildlife is often characterized by long periods of inaction, followed by a short period of action and then a return to inaction. If you need to fumble with your equipment to get your subject in focus, or to dial in the correct exposure, you’re going to miss opportunities and those unique shots. Practice and more practice is the prescription for improving and maintaining your skills.
◦Plan your equipment collection for what you want to photograph. If you’re interested in photographing small birds, there is practically no lens that is too long. You’ll want to practice using your long lens with various extenders and teleconverters to make sure you can still make sharp images. If your passion is large mammals, you can use a shorter lens, but you still need to give consideration to how close you might actually be from these animals. When you can get really close, a wide angle lens creates a unique image. You’ll also want to develop techniques for making quick lens and equipment changes.
◦A sturdy, light-weight tripod is a virtual necessity when working with large telephoto lenses while a gimbal tripod head makes working with those lenses a fingertip operation. A large beanbag is a great means of supporting a lens in a vehicle.
◦One of my favourite times of year for wildlife photography is the winter. In addition to wearing proper winter clothing, look for gloves that allow you to operate your camera while keeping your hands warm and nimble. Hand and feet warmers are great for their intended purposes and provide an excellent means of keeping spare batteries warm and functional.
Red Fox standing on top of a hay bale
◦Natural History – Members of the public are often amazed at the great wildlife photographs they see. When a casual photographer gets close enough to take wildlife shots they are often frustrated at the images they produce. A professional wildlife photographer has learned where to go to find the photographic opportunities and developed a knack for anticipating behaviours. It is through this anticipation and experience that truly memorable behavioural shots are created.
◦Patience – In my experience, there is no other commodity of more value to the wildlife photographer than patience; the patience to get up early to meet the sunrise and find some wildlife, only to discover that the animals have missed the appointment; the patience to find a cooperative subject who doesn’t flee on site; the patience to watch and learn an animal’s behaviour. And, the patience to keep persevering when, after all other conditions were perfect, it just wasn’t the day for any compelling images to be made.
◦Ethics – It is important to respect the life you are photographing. Nothing seems to get a community of photographers more excited than a reliable report of the location of an owl. Soon, groups of photographers are regularly approaching and luring the owl with live bait to create dramatic shots. And while there is probably little wrong with this technique when used in moderation, an owl consistently approached and fed by photographers is often an animal that loses its fear of humans which can lead to disastrous results.
◦I feel that part of coming to understand an animal is learning to respect it. If an animal’s life is truly respected, than the photographer will do nothing that could negatively impact the animal, be that disturbing a sensitive environment or causing an animal stress. This is especially true when it comes to photographing young animals or birds on a nest.
Pair of baby mountain bluebirds peering out of their nest box
◦Composition – Like all types of photography, the way a wildlife photograph is composed creates the drama and interest in a captivating image. The space around an animal and the angle you photograph an animal from are all important considerations.
◦Photographers are often taller than the animals they are photographing and it is important to find a way to minimize this height difference. Getting your knees dirty and moving down to an animal’s eye level or using a long telephoto lens to minimize the apparent height differences are both strategies for levelling this playing field. Putting the camera lens near an animal’s eye level allows for a greater connection between the viewer and subject of a photograph.
◦The space around an animal in an image, what photographers call negative space, is similarly important. Many photographs benefit from having room for an animal to move or look into. We instinctively feel uncomfortable when an image tightly restrains an animal. Amputating an animal’s appendages or body at an awkward place should be avoided. Learn to use both vertical and horizontal compositions to best frame an animal’s particular body structure and stance in the image.
◦Lighting – Learning to see the light and interpret how it will look in an image is a critical skill for the wildlife photographer. The early and late light of the day is often the best light of the day and fortunately coincides with the times when many animals are most active. On the other hand, photographing under high overcast skies provides softbox conditions where you don’t need to worry about harsh light and deep shadows.
◦Flash can add a catch-light in an animal’s eyes. Eyes without catch-lights have a dull or even dead appearance. Flash can also help even out the light and fill in those shadow areas. Concern needs to be given when using flash as to how it affects the animals being photographed and using the flash’s light in moderation to avoid creating images that appear “over flashed.” Using a flash bracket moves the flash away from the lens which helps eliminate the eye shine that may occur with a camera mounted flash.
◦Backgrounds and environment – The first spot you plunk your tripod down is rarely going to be the best spot to make an image. Be aware of clutter in the background that might distract from your subject. The sky in your shot is another background consideration. A washed out white or grey sky seldom makes a compelling background so it is worthwhile working to eliminate or minimize its impact on your image.
◦Many wildlife shots concentrate on capturing frame filling shots, while ignoring the environment the animal is found in. While it can be difficult to create an environmental shot that clearly shows the animal and its environment, these types of images are often more compelling and desirable than a standard portrait shot.
◦Behaviour – Having a portfolio of wonderful animal portraits is great, but the images that stand out are the images where the animals are displaying some sort of behaviour. By studying a species and researching its characteristics you give yourself a greater chance of capturing some unique behaviour in an image.
◦Focus – If nothing else in your image is sharp, the eyes of your primary subject need to be sharp and in focus. Watch your subject’s eyes as they tell the story and help create an emotional connection for the viewer. Learn to watch for the catch-light in your subject’s eyes, or use a flash to add it when it is missing naturally.
◦Getting close – There are few things more frustrating than figuring out how to get close to wildlife. One option is to photograph captive animals at a game farm, animal park or zoo. Another is to go to places where the animals are known to congregate fairly reliably like a wildlife refuge’s blind or attend a wildlife photography tour. And the third method, and the one that takes the most effort by the photographer, is to learn about the animals, learn where they are likely to be and develop the patience and perseverance it takes just to see the animals let alone photograph them.
◦Once you’ve found some wildlife, getting close enough for a good shot is another challenge. Animals often react negatively to sudden movements. Learning to move slowly and carefully is paramount. Try to avoid making eye contact or making a direct approach as most animals associate this with predator behaviour. Don’t rely on getting close but start making images from your original position and then try to move in, photographing occasionally as you get closer. Consider not moving for some time to allow the animals to become comfortable in your presence and determine that you are not a threat.
◦If you’re in an area where you know there will be animals, like a bird feeder or watering station, consider the use of a blind. Many hunting blinds make perfect photography hides as they are extremely portable and use materials to conceal movements and scents. A vehicle makes an excellent photography blind and will often get you closer to an animal than you could ever get on foot. Remember to turn the vehicle off to eliminate vibrations from the engine.
Wildlife photography is certainly not the easiest area of photography to specialize in. However, with some time, dedication, perseverance and patience, it can become a very rewarding and contemplative pursuit that will ultimately give you more respect for the animals and environment around you.
![]()
![]()
![]()
![]()
![]()
![]()
![]()
![]()
![]()
![]()
![]()
![]()
![]()
![]()
![]()
![]()
http://www.paulburwell.com/blog/2009/04/top-ten-wildlife-photography-tips/
by Paul Burwell in Equipment, Everything, Wildlife photography
Creating a tremendous wildlife photograph is an extremely rewarding pursuit. However, developing the skills and techniques necessary to create captivating wildlife images is more difficult than it might appear on the surface. Composition, lighting, equipment, natural history, and patience are just some of the areas the wildlife photographer needs to specialize in.
Sometimes wildlife photography can even be a spontaneous burst of creative impulses – if you catch a wren sitting in the morning sunlight in your garden, or find some squirrels quarrelling over nuts while you’re strolling past gatwick hotels on your way to a convention. Whether you’re prepared or grabbing your camera out of your bag to capture a unique moment while somewhere else, it’s important to maintain some semblance of skill and technique, even spontaneously, to be able to capture the magic and create high-quality images.
◦Equipment – Photographing wildlife is often characterized by long periods of inaction, followed by a short period of action and then a return to inaction. If you need to fumble with your equipment to get your subject in focus, or to dial in the correct exposure, you’re going to miss opportunities and those unique shots. Practice and more practice is the prescription for improving and maintaining your skills.
◦Plan your equipment collection for what you want to photograph. If you’re interested in photographing small birds, there is practically no lens that is too long. You’ll want to practice using your long lens with various extenders and teleconverters to make sure you can still make sharp images. If your passion is large mammals, you can use a shorter lens, but you still need to give consideration to how close you might actually be from these animals. When you can get really close, a wide angle lens creates a unique image. You’ll also want to develop techniques for making quick lens and equipment changes.
◦A sturdy, light-weight tripod is a virtual necessity when working with large telephoto lenses while a gimbal tripod head makes working with those lenses a fingertip operation. A large beanbag is a great means of supporting a lens in a vehicle.
◦One of my favourite times of year for wildlife photography is the winter. In addition to wearing proper winter clothing, look for gloves that allow you to operate your camera while keeping your hands warm and nimble. Hand and feet warmers are great for their intended purposes and provide an excellent means of keeping spare batteries warm and functional.
Red Fox standing on top of a hay bale
◦Natural History – Members of the public are often amazed at the great wildlife photographs they see. When a casual photographer gets close enough to take wildlife shots they are often frustrated at the images they produce. A professional wildlife photographer has learned where to go to find the photographic opportunities and developed a knack for anticipating behaviours. It is through this anticipation and experience that truly memorable behavioural shots are created.
◦Patience – In my experience, there is no other commodity of more value to the wildlife photographer than patience; the patience to get up early to meet the sunrise and find some wildlife, only to discover that the animals have missed the appointment; the patience to find a cooperative subject who doesn’t flee on site; the patience to watch and learn an animal’s behaviour. And, the patience to keep persevering when, after all other conditions were perfect, it just wasn’t the day for any compelling images to be made.
◦Ethics – It is important to respect the life you are photographing. Nothing seems to get a community of photographers more excited than a reliable report of the location of an owl. Soon, groups of photographers are regularly approaching and luring the owl with live bait to create dramatic shots. And while there is probably little wrong with this technique when used in moderation, an owl consistently approached and fed by photographers is often an animal that loses its fear of humans which can lead to disastrous results.
◦I feel that part of coming to understand an animal is learning to respect it. If an animal’s life is truly respected, than the photographer will do nothing that could negatively impact the animal, be that disturbing a sensitive environment or causing an animal stress. This is especially true when it comes to photographing young animals or birds on a nest.
Pair of baby mountain bluebirds peering out of their nest box
◦Composition – Like all types of photography, the way a wildlife photograph is composed creates the drama and interest in a captivating image. The space around an animal and the angle you photograph an animal from are all important considerations.
◦Photographers are often taller than the animals they are photographing and it is important to find a way to minimize this height difference. Getting your knees dirty and moving down to an animal’s eye level or using a long telephoto lens to minimize the apparent height differences are both strategies for levelling this playing field. Putting the camera lens near an animal’s eye level allows for a greater connection between the viewer and subject of a photograph.
◦The space around an animal in an image, what photographers call negative space, is similarly important. Many photographs benefit from having room for an animal to move or look into. We instinctively feel uncomfortable when an image tightly restrains an animal. Amputating an animal’s appendages or body at an awkward place should be avoided. Learn to use both vertical and horizontal compositions to best frame an animal’s particular body structure and stance in the image.
◦Lighting – Learning to see the light and interpret how it will look in an image is a critical skill for the wildlife photographer. The early and late light of the day is often the best light of the day and fortunately coincides with the times when many animals are most active. On the other hand, photographing under high overcast skies provides softbox conditions where you don’t need to worry about harsh light and deep shadows.
◦Flash can add a catch-light in an animal’s eyes. Eyes without catch-lights have a dull or even dead appearance. Flash can also help even out the light and fill in those shadow areas. Concern needs to be given when using flash as to how it affects the animals being photographed and using the flash’s light in moderation to avoid creating images that appear “over flashed.” Using a flash bracket moves the flash away from the lens which helps eliminate the eye shine that may occur with a camera mounted flash.
◦Backgrounds and environment – The first spot you plunk your tripod down is rarely going to be the best spot to make an image. Be aware of clutter in the background that might distract from your subject. The sky in your shot is another background consideration. A washed out white or grey sky seldom makes a compelling background so it is worthwhile working to eliminate or minimize its impact on your image.
◦Many wildlife shots concentrate on capturing frame filling shots, while ignoring the environment the animal is found in. While it can be difficult to create an environmental shot that clearly shows the animal and its environment, these types of images are often more compelling and desirable than a standard portrait shot.
◦Behaviour – Having a portfolio of wonderful animal portraits is great, but the images that stand out are the images where the animals are displaying some sort of behaviour. By studying a species and researching its characteristics you give yourself a greater chance of capturing some unique behaviour in an image.
◦Focus – If nothing else in your image is sharp, the eyes of your primary subject need to be sharp and in focus. Watch your subject’s eyes as they tell the story and help create an emotional connection for the viewer. Learn to watch for the catch-light in your subject’s eyes, or use a flash to add it when it is missing naturally.
◦Getting close – There are few things more frustrating than figuring out how to get close to wildlife. One option is to photograph captive animals at a game farm, animal park or zoo. Another is to go to places where the animals are known to congregate fairly reliably like a wildlife refuge’s blind or attend a wildlife photography tour. And the third method, and the one that takes the most effort by the photographer, is to learn about the animals, learn where they are likely to be and develop the patience and perseverance it takes just to see the animals let alone photograph them.
◦Once you’ve found some wildlife, getting close enough for a good shot is another challenge. Animals often react negatively to sudden movements. Learning to move slowly and carefully is paramount. Try to avoid making eye contact or making a direct approach as most animals associate this with predator behaviour. Don’t rely on getting close but start making images from your original position and then try to move in, photographing occasionally as you get closer. Consider not moving for some time to allow the animals to become comfortable in your presence and determine that you are not a threat.
◦If you’re in an area where you know there will be animals, like a bird feeder or watering station, consider the use of a blind. Many hunting blinds make perfect photography hides as they are extremely portable and use materials to conceal movements and scents. A vehicle makes an excellent photography blind and will often get you closer to an animal than you could ever get on foot. Remember to turn the vehicle off to eliminate vibrations from the engine.
Wildlife photography is certainly not the easiest area of photography to specialize in. However, with some time, dedication, perseverance and patience, it can become a very rewarding and contemplative pursuit that will ultimately give you more respect for the animals and environment around you.

A golden lioness and her cub bask in the warmth of a savanna sun in Tanzania’s Serengeti National Park.

the-white-bangal-tigers

lion king

Golden Love

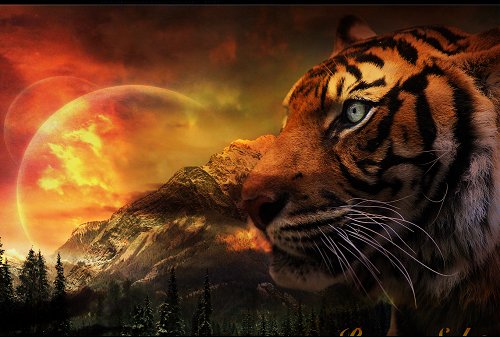
Tiger

Cheetah


Cheetah Mom Club

Rare Snow Leopard

The Predador

Hannibal

Mystic Wolf

Gray wolf

Hills Horses

Leopard Zebra
Sunday, July 10, 2011
Animated GIFs-Photography= Cinemagraph
"Cinemagraph" technique
Jamie Beck & Kevin Burg have been making quite a splash this year with their "cinemagraph" technique, combining still photography and video to "unfreeze" a photo in time. The results are stunning, and show that there was more potential in the old animated .gif format than had yet been realized.
We caught up with Jamie and Kevin, who let us in on their process.
Turnstyle: Animated .gifs have long been the territory of goofy forum signatures and internet memes, what caused you to take the idea of animated photographs up to the level of art?
Jamie & Kevin: We wanted to tell more of a story than a single still frame photograph, but didn't want the high maintenance aspect of a video. In preparation for Fashion Week we were trying to figure out a way to show more about what it was like being there, so cinemagraphs were born out of a need to tell a story in a fast digital age.
![]()
![]()
![]()
The basis for these is always a still photograph which is why they maintain the artistic approach and visual style of Jamie's still photography. What we strive to capture is the moments before and after a photograph is taken.
TS: Why "cinemagraph"?
J&K: There's a cinematic quality to them in both the way it captures a moment as well as the coming together of still imagery and moving imagery. "Cinemagraph" represents, in a single word, what the images represent visually. Coco Rocha put it well: "More than a photo, but not quite a video."
Technically speaking, how are these different from animated .gifs? I'm perceiving a lot more frames of animation for one, but is that just my brain filling in the blanks? It also feels like the animated parts are isolated from the rest of the composition.
J&K: An animated .gif is usually a sequence of stills pulled from video, animated art, or other imagery that is repurposed into a .gif. What we do is different because it's a traditional still photograph with a moment living within it. For us it's less about the .gif format -- that's just the vessel by which it's best to deliver them on the web, although the limitations of the format have been very influential on the visual style of our images. The .gif format itself is ancient by internet standards but much like photography people are always finding interesting new ways to communicate within the confines of existing formats
SOURCE:http://www.huffingtonpost.com/turnstyle/so-long-animated-gifs-hel_b_853450.html
![]()
![]()
![]()
![]()
Jamie Beck & Kevin Burg have been making quite a splash this year with their "cinemagraph" technique, combining still photography and video to "unfreeze" a photo in time. The results are stunning, and show that there was more potential in the old animated .gif format than had yet been realized.
We caught up with Jamie and Kevin, who let us in on their process.
Turnstyle: Animated .gifs have long been the territory of goofy forum signatures and internet memes, what caused you to take the idea of animated photographs up to the level of art?
Jamie & Kevin: We wanted to tell more of a story than a single still frame photograph, but didn't want the high maintenance aspect of a video. In preparation for Fashion Week we were trying to figure out a way to show more about what it was like being there, so cinemagraphs were born out of a need to tell a story in a fast digital age.


TS: Why "cinemagraph"?
J&K: There's a cinematic quality to them in both the way it captures a moment as well as the coming together of still imagery and moving imagery. "Cinemagraph" represents, in a single word, what the images represent visually. Coco Rocha put it well: "More than a photo, but not quite a video."
Technically speaking, how are these different from animated .gifs? I'm perceiving a lot more frames of animation for one, but is that just my brain filling in the blanks? It also feels like the animated parts are isolated from the rest of the composition.
J&K: An animated .gif is usually a sequence of stills pulled from video, animated art, or other imagery that is repurposed into a .gif. What we do is different because it's a traditional still photograph with a moment living within it. For us it's less about the .gif format -- that's just the vessel by which it's best to deliver them on the web, although the limitations of the format have been very influential on the visual style of our images. The .gif format itself is ancient by internet standards but much like photography people are always finding interesting new ways to communicate within the confines of existing formats
SOURCE:http://www.huffingtonpost.com/turnstyle/so-long-animated-gifs-hel_b_853450.html


Monday, July 4, 2011
Beautiful HDR Photos Of Airports In Asia
HDR, also known as High Dynamic Range, is a set of techniques that when applied carefully, magically transforms your photographs into really stunning ones. It has been widely used by photographers to record a greater range of tonal detail than a single aperture and shutter speed. HDR photographs are generally achieved by capturing multiple photographs (taking one photograph for the sky and one for the ground), merging them together in Photoshop, and then modifying it with an image processing software such as Photomatix.
Though it is frequently use to create dramatic images of landscapes and scenery, photographers have also creatively applied HDR onto photographs taken in the interior of buildings to capture the magnificent architecture. This post is a quintessential example. Below are 40 Exceptionally Beautiful HDR Photos Of Airports In Asia. Yes, the following photos may look like artist illustrations, but in fact all of them are developed out of usual photos. Enjoy!
Changi International Airport – Singapore
![]()
![]()
![]()
![]()
![]()
Kuala Lumpur International Airport – Malaysia
![]()
![]()
![]()
![]()
Suvarnabhumi Airport – Thailand
![]()
![]()
![]()
![]()
Dubai International Airport – U.A.E
![]()
![]()
Incheon International Airport – South Korea
![]()
![]()
![]()
Taoyuan International Airport – Taiwan
![]()
![]()
![]()
Shanghai Pudong International Airport – China
![]()
![]()
Tokyo Haneda Airport – Japan
![]()
![]()
Software HDR EFEX PRO
Though it is frequently use to create dramatic images of landscapes and scenery, photographers have also creatively applied HDR onto photographs taken in the interior of buildings to capture the magnificent architecture. This post is a quintessential example. Below are 40 Exceptionally Beautiful HDR Photos Of Airports In Asia. Yes, the following photos may look like artist illustrations, but in fact all of them are developed out of usual photos. Enjoy!
Changi International Airport – Singapore

Source: Lipjin

(Source: Studioku)

(Source: Life in AsiaNZ)

(Source: GeeBee)

(Source: GeeBee)
Kuala Lumpur International Airport – Malaysia

Source: Trey Ratcliff

Source: Trey Ratcliff

Source: Grant Cameron

(Source: Christopher Chan)
Suvarnabhumi Airport – Thailand


Source: DanielKHC)

Source: Grant Cameron
Dubai International Airport – U.A.E

Source: Shenghung Lin)

Source: azrEYEn
Incheon International Airport – South Korea

Source: Bongo Mike)

Source: R.K. M)

Source: R.K. M
Taoyuan International Airport – Taiwan

Source: Kent)

Source: Gilles Marcil

(Source: Thomas)
Shanghai Pudong International Airport – China


Tokyo Haneda Airport – Japan


Software HDR EFEX PRO
Subscribe to:
Posts (Atom)