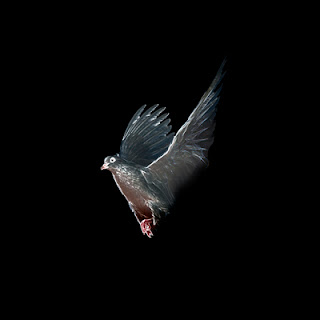
In this tutorial, we are going to create a dove like spirit bursting out of a woman's body amidst the cloudy sky. This tutorial uses a basic filter of glowing edge to create those shiny outlines engulfing the objects.
These are the images that we are going to use:
Woman: 280543 © Galina Barskaya 123RF.com
Dove: 7478307 © Irina Tischenko 123RF.com
Clouds 1: 633425 © Feng Yu 123RF.com
Clouds 2: 2954467 © Chris Hill 123RF.com
Stars: 3404631 © Martin Benes 123RF.com
Start off with a basic black background, and have all of the elements nicely masked of its background. Place it accordingly.
Hide the dove for now as we will be focusing on the woman. Since we will be needing multiple instances of the woman layer, duplicate it a few times.
Before we proceed, here's a rough guideline on layer accordance. We should have 4 duplicates (for now), namely base object > 'Screen' outline > 'Overlay' outline > Color mode layer.
Take one of the duplicate on top and apply Glowing edges.
Change this to 'Screen' blend mode. This will be our 'Screen' outline layer, on top of base model
Apply the same filter to another duplicate and this time change to 'Overlay' blend mode, on top of 'Screen' outline layer
Use the 3rd duplicate and change it to 'Color' mode. This will give color to the glowing lines. Positioned at the top most layer.
Certain glowing lines are too thick around the face. So mask it off at both of the layers ('Screen' & 'Overlay' outline).
Adding flames around the body
For the next step, duplicate another instance of the base model and put the duplicate on top. Apply a 'Outer glow' layer style.
Create a new layer just above the 'Outer glow' layer, and create a difference cloud rendering (apply a couple of times to make the lines more extreme).
Set its blend mode to 'Color dodge', and erase areas so that the effect only falls around the model. We can use the 'Outer glow' layer's setting to control how far the flame is extruding (the bigger the glow size, the bigger the flame radius
Once done, we can group these layers together, namely 'woman'. An overview of the layers involved:
The next series of mini-steps is what I've done to create those stretchy bursting lines. This section is merely a rough guide, albeit an unorthodox one to achieve the desired effect.
1.Copy a portion of glowing lines. Preferably from the flowing cloth area. These lines are desaturated, warped, and smudged.
2.Duplicate another copy, blend it in, and smudge in more.
3.Third duplicate isn't desaturated, but blurred, and smudge even more. Blended it as 'Screen' mode.
4.Combine all the above.
5.Duplicate the combined and applied warping and further smudging it to a stretchy curvy state.
6.Mask off excessive areas.
7.Select base model, 'Screen' blend mode, and 'Overlay' blend mode. Duplicate a copy each. Combine them and start smudging the body area upwards. Change this layer to 'Color dodge' blende mode, and erase excessive areas.
8.Result.
We can now place that effect on top of the group 'woman'
With the layer 'base model' selected, mask of the areas connecting the effect and the body
Add in light rays that are seen exiting the eyes and mouth. Mix motion blur and transform tool to achieve the desired rays.
The dove effect is of similar steps to the above. Duplicate layers
Apply glowing edge.
Set it to 'Screen' blend mode
Duplicate and Set it to 'Color dodge' to intensify the glowing lines.
Have another copy set to 'Color' blend mode above all.
Mask and drag white blending slider of grey channel to around '30'.
Duplicate another instance of dove and apply 'Outer glow' layer style. Mask off most of the areas, revealing only around the edge of the dove.
Put the rendered difference clouds on top and set it to 'Color dodge'.
Mask the excessive areas off, resulting in this:
Once done, we can group these layers together as 'dove'. An overview of the layers involved:
Cloudy background:
I mixed 2 sets of clouds.
Copy and paste a portion of the clouds to form the background. Mask, rotate, transform, and merge them so that the background is completely filled.
Remove some white off the clouds by dragging the blend slider. We are done with the clouds for now.
Next step is to flatten the woman and the dove. Duplicate 'woman' and 'dove' groups. Create a new black filled layer and put it below the duplicated groups. Then merge them together
Set this layer to 'Screen' blend mode
Because 'Screen' blend mode knocks out black color, it looks rather fade. At this point, we can bring up the 'woman' group and mask to reveal the areas which are deem faded.
Using the same reference images of clouds, copy some and place it at the leg
defined a new brush using this shape:
And drew shiny white particles around the body with the new brush
Add in some snow storm effect to dramatize the final picture. As a final step, always sharpen the image a little to increase definition.
Another take at this image, this time with a blue-ish tint.
SOURCE http://www.123rf.com/blog/blog.php?idblog=b1000167&v=nl&e=0111&id=572360544C6351
אתר הדפוס המוביל בישראל - מוצרי דפוס בעיצוב עצמי


Lina
ReplyDeleteThis is nothing, but a genius job!!!
Great!!!
Thank you for sharing.