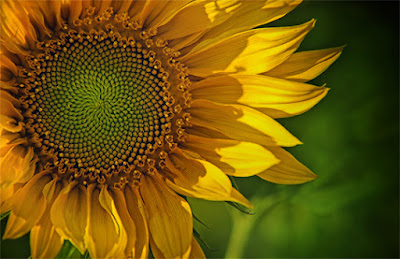
Hypnotic seeds© Jörg Hubrich
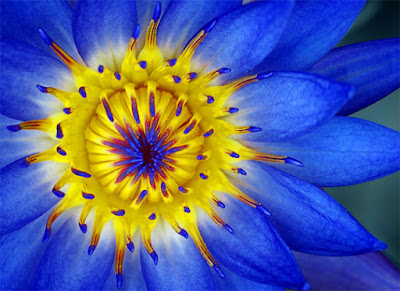
Sweet Dreams© Billie Jo Moscherosch
Himalayan Blue Poppy © Margaret Barry
Explosion © Sarah Donoghue
Pointed Cyclamen in natural light © Margaret Barry
BLue Poppy © Tracy Martin
the daisy experiment in-camera double exposure
Celestial Gardening Hibiscus Flower
© Scott Richter
Floral Lights © Anna Ridley
Yellow on Blue © Pedro Lastra
Rose © Olivier Maurin
Dahlia © Daniel
10 Tips for Great Flower Photography
Flower photography is not only a great way to spend your time learning different photography techniques it is also a great way to add to your home decor! Flowers are a fantastic subject, not just because of their beauty, but also because of their availability. If you don’t have any flowers in your own yard to photograph you don’t have to go far to find some. You can easily photograph flowers at your local park, the Mall, a restaurant, a friends garden, a community garden, just about every where you go there are flowers.
If you don’t want to photograph flowers in their natural setting you can purchase flowers in most grocery stores or at a local flower shop to take home and photograph in a studio setting. In fact, it’s hard to find a legitimate reason for not photographing flowers.
Let’s get down to business. Here is a list of 10 tips that will help you create some amazing flower photography.
1. One of the first things you need to do with digital photography is to make sure you are using the correct white balance settings. If your camera has the option, I recommend that you use the manual white balance function. If not, then use whatever setting is appropriate for the lighting you are shooting with. The equivalent to white balance if you are shooting film is color balance. If you are shooting outside be sure you are using daylight balanced film. I also suggest that with daylight balanced film outdoors that you use a slight warming filter. Most of the flower photography that you may do will either be in shade or on an overcast day creating a much bluer light then the film is balanced for. On the flip side, if shooting indoors with incandescent lighting or normal house lights you should be using tungsten balanced film. If the indoor lighting is being supplied by florescent light, then use a florescent filter with daylight balanced film. This is just a starting point. Experiment, mix it up. You can get some fantastic special effects that way.
2. Get a polarizer filter. The great thing about a polarizer is that it will eliminate or reduce image degrading reflections. This helps to improve color saturation and contrast. At the proper angle it will also dramatically darken a blue sky. This effect is adjusted by rotating the filter until the desired effect is achieved. There are 2 types of polarizer’s available, circular and linear. Most of the advanced metering systems today that are built into your camera will not function properly with a linear polarizer. So I suggest you get a circular polarizer to play it safe. I have also seen warming polarizer’s. While I have not tried one you may want to experiment with them.
3. Always use a tripod. Let me repeat that, “Always use a tripod”. Not only will a tripod steady your camera and help you achieve a much sharper image, but it will also force you to think about your composition. You will have to place the flowers in your photographic image much more deliberately instead of just pointing your camera and shooting away.
4. Don’t just take a snapshot of a flower that interests you and then move on. Set up your first shot to include the whole flower then concentrate on the details of the flower that attract your eye. Focus on the color or small details of the flower.
5. Control your depth of field. If you are photographing a single flower with a busy background then use a wide aperture to selectively focus on the flower and blur out the background. Conversely, if you are photographing a field of flowers the use a smaller aperture setting to bring most, if not all the flowers into focus. If your camera has a depth of field preview then this is the time to use it.
6. Look for the unusual. Some examples would be snow or ice on a flower, A flower growing out of concrete or even a dead flower that has an interesting look.
7. Don’t put your camera away just because it’s cloudy or looks like a storm is coming. Colors really pop at this time and you can get some amazing photographs in these conditions. I have even photographed in rainy and foggy weather with great results. Be sure to use a tripod and keep your gear dry.
8. On a bluebird sunny day, soften the harsh contrasty light by placing a diffusion screen between the flower you are photographing and the sun. You can purchase a portable diffusion screen or use something you have on hand. You can completely block the sun and put your flower in shade, then redirect some light back on the flower with a reflector. This reflector can be a commercially made reflector or just something reflective like a white T-shirt or a piece of foam core. Another photographic technique would be to use fill flash. If your camera has an automatic fill flash function then give it a try. Experiment with the lighting ratio if your camera will let you change the flash output. I find reflectors to be a better option then fill flash most of the time.
9. Photograph your flowers from different angles. Shoot straight down, from the side, from the underneath, just change it up a little.
10. Have fun with it. Don’t be afraid to experiment and try different things. Once you think you have the photograph in the bag, get wacky with it!


No comments:
Post a Comment